Project: Sweetheart Chair Decor
 Inspiration: I saw a lot of images online with things like "I'm his Mrs."/"I'm her Mr." or something else cutesy (see examples) and the one that made me smile was the one with The Proclaimers lyrics from "I Will Be" - the "I would walk 500 miles... and I would walk 500 more" super catchy tune (and one that's very familiar to fans of TV show How I Met Your Mother). It grows on you. And it's sweet!
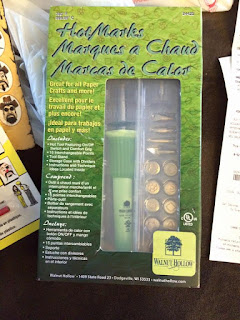
 Cost/Materials: Rather than painting/chalking the signs, I wanted to keep with our "natural" looking materials like wood and cork, so I decided I would woodburn this one. This and all the other woodburning projects I did were the result of investing in a woodburning tool. Walnut Hollow has several good starter tools, including this one as well as some that are cheaper. I went for this one (about $35, but I got it half off using a coupon for closer to $17) because it had a heart shaped stamp tip as an accessory. For me, investing in the tool was worth it because I had a couple different projects in mind when I got it. My first time around, I tried just free-writing with what I believe they call a "flow tip," but wood is grainy and uneven and it makes it really hard to write smoothly, at least if you're new to using the tool, so I decided after my first failed attempt that I would invest in the attachable letter stamps. As you can see, they can run you a pretty penny. I got mine using Amazon prime instead, and paid only $14 total. The wooden hearts I used were from AC Moore, though they do carry similar ones at Michaels. They cost about $1.50 a piece, which is good news, because I messed this project up several times and am glad buying new materials didn't cost too much. I also used wood stain (a super old can that hadn't been touched in a decade that I snagged from my parents' basement), a small sanding block, and some pliers (to change out the tips of the heat tool without having to wait for it to cool down). You will want to make sure you have a surface to put the hot letter stamps on while they cool; I used a kitchen oven mitt.
How I Did It: I placed the letters out for what I wanted to write, and moved them around until the spacing looked good. Then I knew how many lines it would take, so I evenly spaced the horizontal lines to make sure things would be aesthetically pleasing and not slant in any wrong directions. Next I spaced out exactly where each letter would rest on the lines; you can probably see the little notches along the lines, and maybe the faint scribble of letters written in pencil. This was so as I changed out the tip of the heat tool, I'd know exactly where to stamp each letter and could get all instances of the same letter on both hearts done in one fell swoop. Once I was done, I erased all the pencil marks. One thing that takes getting used to is determining how long to press the letters down. I found that if you've let them heat up for about a minute before stamping it on the wood, it only takes about six seconds of pressing to get a good mark. If you hold it down longer the letters are more "burnt" and then look more black. I liked the natural variation my inexperience gave to the letters.
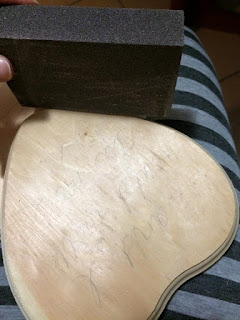
There were a few times when I really held the letter down for too long, though, which resulted in a burnt area beyond just the letter. This was relatively easy to fix up with just a little bit of sanding. Once it was all cleaned up and looking good, I thought it looked a little... boring. I remembered that heart stamp that came with the kit and decided I'd like to do some little flowy designs with it. I entrusted that task to my mom, because #delegation. Then I stained them up!
 The Outcome: Pretty sweet! I am not sure yet whether we will actually hang them from the back of our chairs, because, as my smart cookie fiance pointed out, no one is really going to see the backs of our chairs because of how the sweetheart table gets placed in our venue. So maybe they'll be used elsewhere, but they are certainly cute regardless!
 Lessons Learned/Tips: (1) Free-handing takes practice. My first attempt sure wasn't pretty; stamped letters were the way to go. (2) Make sure you've run your penciled design by someone before you put the tool to the wood. I wrote out "I would walk 5,000 miles" the first time around, when the lyric is really five hundred miles. On the second time around, I wrote the same lyrics on both the hearts, when the second one should be "And I would walk 500 more" so that was a bummer. Totally could have been avoided if I had just slowed down and had someone check. (3) This is common sense for most, but I also messed up the wood stain the first time that I got around to that step. As I mentioned, I grabbed some wood stain from my parents' basement. I got a couple jars, and it ends up the first one I went with was actually more of a weatherproof sealant without much color to it... silly me, I put it on thinking the color (white) would deepen/bring out the natural tones of the wood as it dried. This is not the case. You want wood stain that looks like it's going to stain wood. Embarrassing! Not only had I not stained it, but I had waterproofed it which kept it from being stained after. Not even standing fixed that. Super frustrating! My fiance will probably not let me live that one down.
Would I Do It Again: I can't imagine doing this exact project over again, because it took three takes and a whole lot of frustration to finish it. As you can see, I took some of my frustration out by testing stamp letters on one of the failed attempts. That being said, I do like using the woodburning tool, and now that I have a good handle on it I can see myself trying other stuff with it going forward. I'd say this project isn't for the total novice crafter, if only because of how much patience you need for it.


No comments:
Post a Comment